Using Authorist
Getting started: create your account and author page
How to create your Authorist account, set up your author page and username, and turn on payouts — your first steps to start selling your books and courses online.
Last updated Mon Jun 01 2026 00:00:00 GMT+0000 (Coordinated Universal Time)
Who this is for: New authors signing in for the first time who want to get set up and ready to sell their books, courses, and other work.
What you'll accomplish: Create your account, confirm your email, set up your public author page, and (optionally) turn on payouts — so you finish with a live page at authorist.co/your-username, ready to add your first book.
Step 1 — Create your account
- 1
Fill in the signup form
On the Authorist signup page, enter your full name, email, and a password (at least 8 characters). Leave "Keep me updated on new features and creator tips" checked if you'd like occasional tips, then click Create Account.
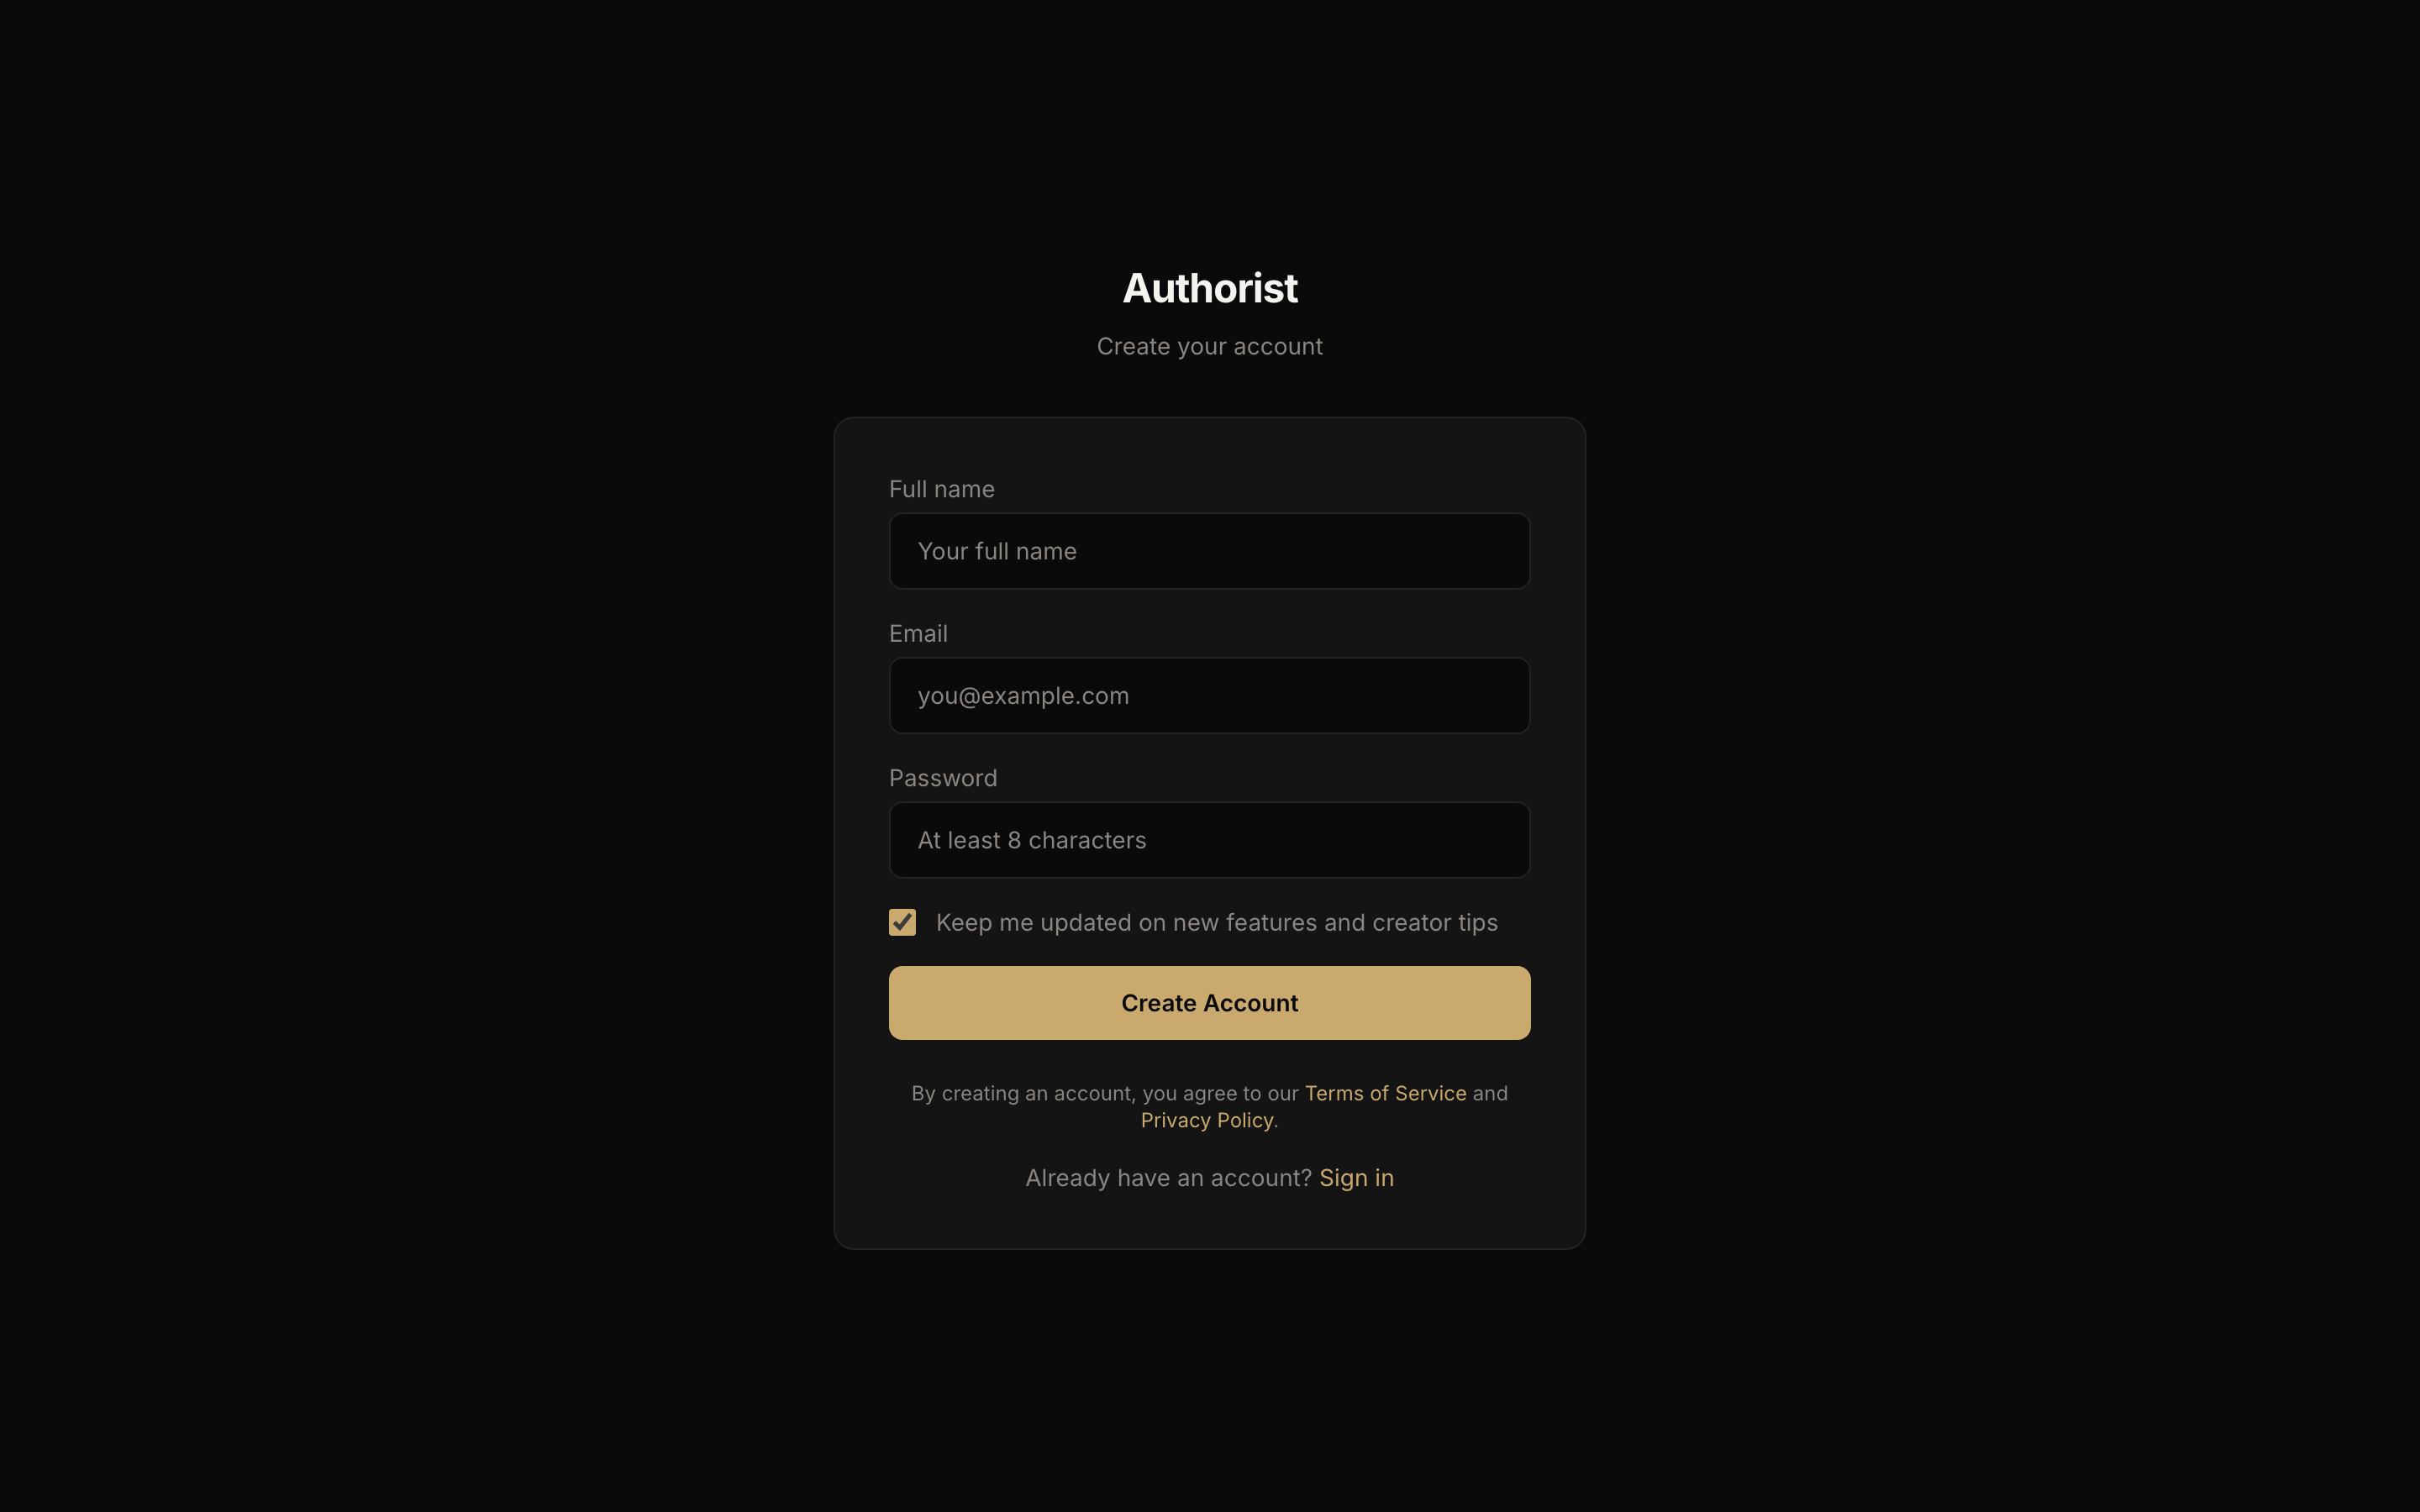
Create your account with your name, email, and a password. - 2
Confirm your email
You'll see a "Check your email" screen. Open the email from Authorist — subject "Confirm your Authorist account" — and click Confirm Email.
Tip
Don't see it? Check your spam folder, then use the Resend email button on the "Check your email" screen.
Step 2 — Set up your author page
After you confirm, you'll land on a short 3-step setup. The first step creates your public page.
- 1
Choose your display name and username
Enter the display name readers will see, then pick a username — this becomes your public web address, authorist.co/your-username. Usernames use lowercase letters, numbers, and hyphens; Authorist checks availability as you type (✓ Available / ✗ Taken).
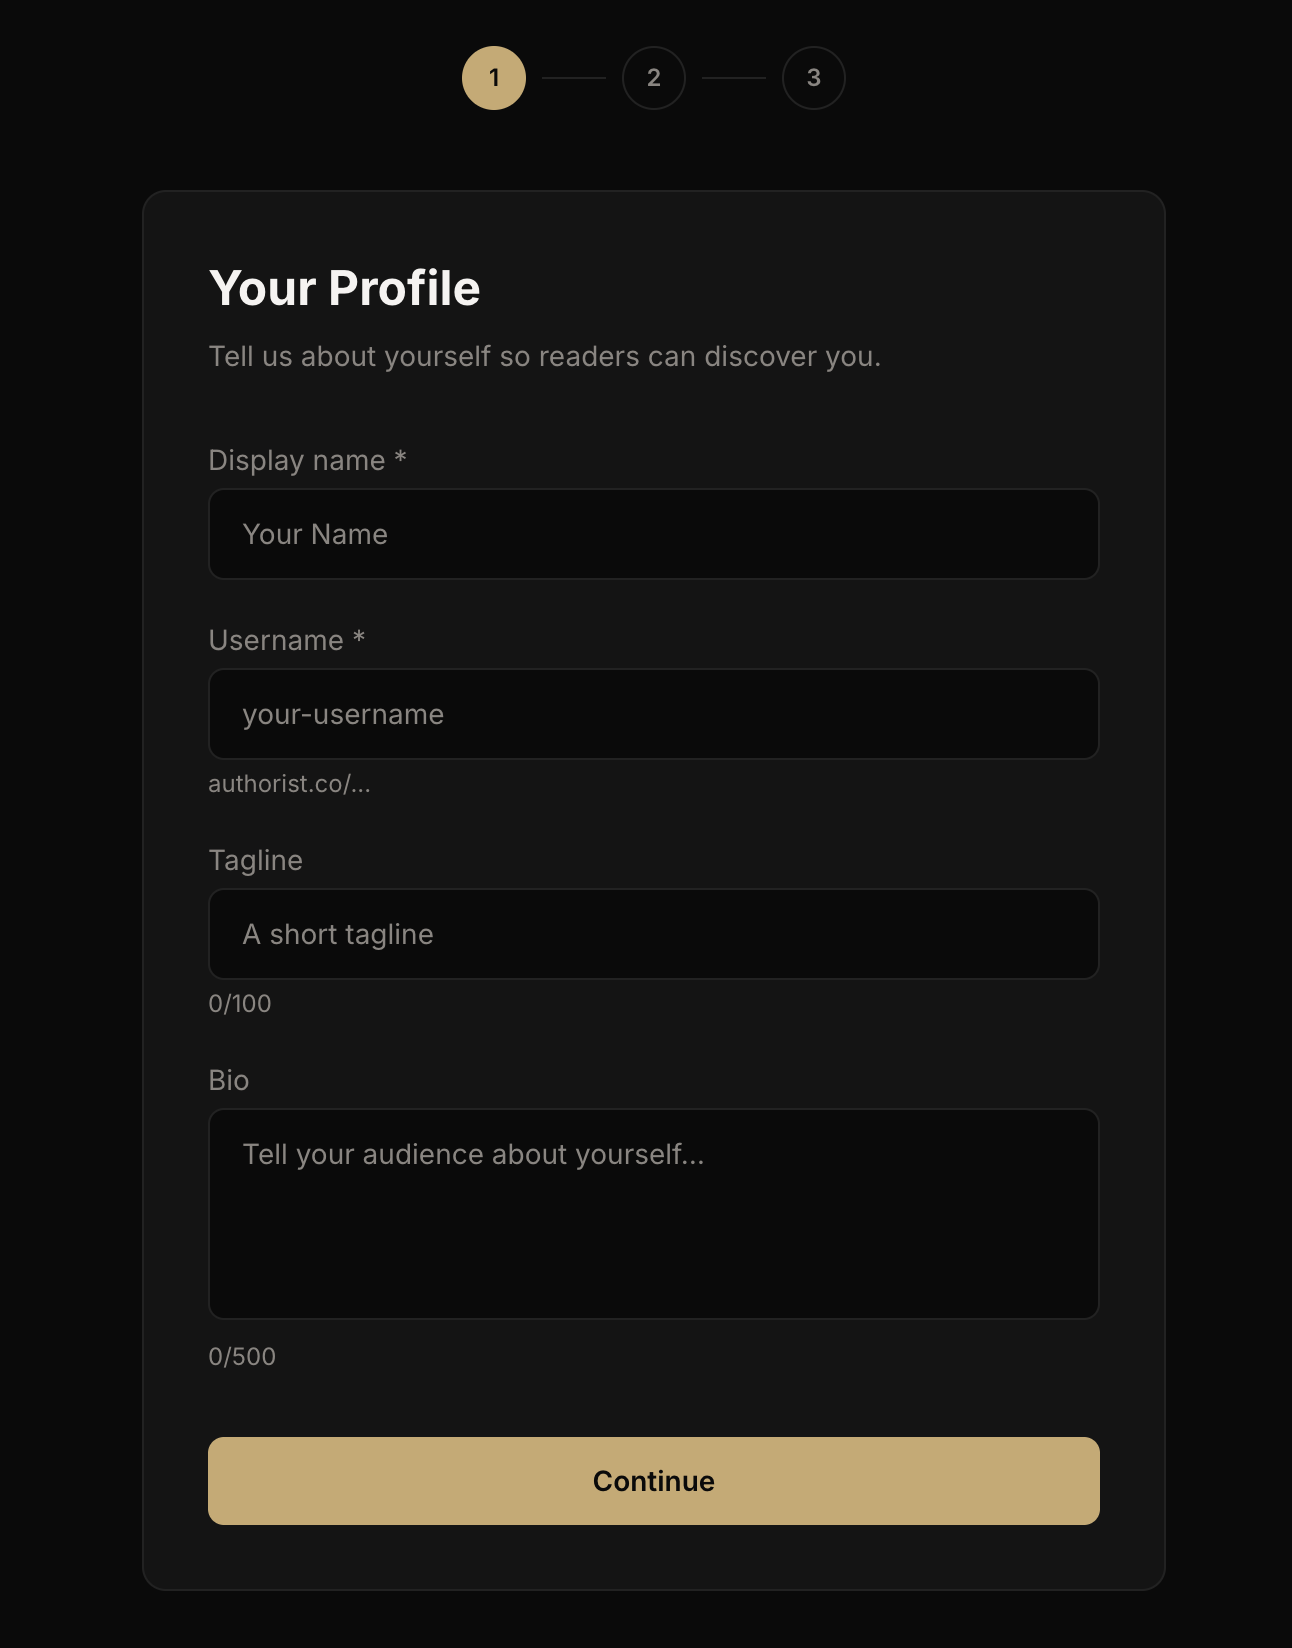
Your username becomes your public page: authorist.co/your-username. - 2
Add a tagline and bio (optional)
Add a short tagline and a bio so readers get to know you — or skip them for now and add them later from your dashboard. Click Continue.
Step 3 — Turn on payouts so you can get paid
Next you'll see "Get paid for your work." This connects your bank details through Stripe, the service Authorist uses to pay you securely.
- 1
Set up now, or skip for later
You can Set up payouts now, or choose Skip for now and finish later from your dashboard — skipping doesn't hold up the rest of setup.

Set up payouts now, or skip and finish later from your dashboard. Heads up
You can build your page and add products without this — but Authorist can't send you money from a sale until payouts are set up, so finish it before your first sale. - 2
What Stripe will ask for
If you set up now, Stripe will ask for a government-issued ID or the last 4 digits of your SSN, your bank routing and account number, your address, and a phone number. Complete the whole form so payouts work — if you close it early, you can pick back up later from your dashboard.
You're ready
You'll land on a "You're ready!" screen confirming your page is live at authorist.co/your-username, then Go to your dashboard. From there you can add your first book, course, or product and start selling.
Common problems
- Confirmation email didn't arrive — check spam, then click Resend email on the "Check your email" screen. It comes from Authorist, subject "Confirm your Authorist account."
- "An account with this email already exists" — you've signed up before; use Sign in instead (and "Forgot your password?" if you need it).
- Username says "Taken" — pick another; only lowercase letters, numbers, and hyphens are allowed.
- Skipped payouts and want to finish — open your dashboard and you'll see a prompt to finish setting up payouts.
What's next
- How to set up Meta ads and your Pixel — when you're ready to advertise your work.
- Browse Marketing & growth guides — more on selling and promoting.