Marketing & growth
Set up Meta ads and your Pixel
Connect Facebook & Instagram, set up your Meta Pixel, and run ads for your books — all inside Authorist. (Studio plan.)
Last updated Tue Jun 02 2026 00:00:00 GMT+0000 (Coordinated Universal Time)
Who this is for
Studio authors who want to advertise their books on Facebook and Instagram and track how those ads perform.
What you'll accomplish
Connect your Meta account, turn on your Meta Pixel so sales are tracked, and launch your first ad — without installing any code anywhere.
Tip
Before you start
- You're on the Studio plan.
- You have a Facebook Page for your author brand (a linked Instagram is ideal but optional). If you don't manage any Page yet, create one in Meta first — otherwise the Page picker in the connect step will be empty and you won't be able to finish.
- You have a Meta ad account with a valid payment method on it. Your ads run on your own Meta ad account, and Meta charges that payment method directly for ad spend.
- You do not need to install anything on a website — Authorist handles the Pixel for you.
Tip
Step 1 — Connect your Meta account
- 1
Open Advertising → Accounts
In your Authorist dashboard, open Advertising, then the Accounts tab.
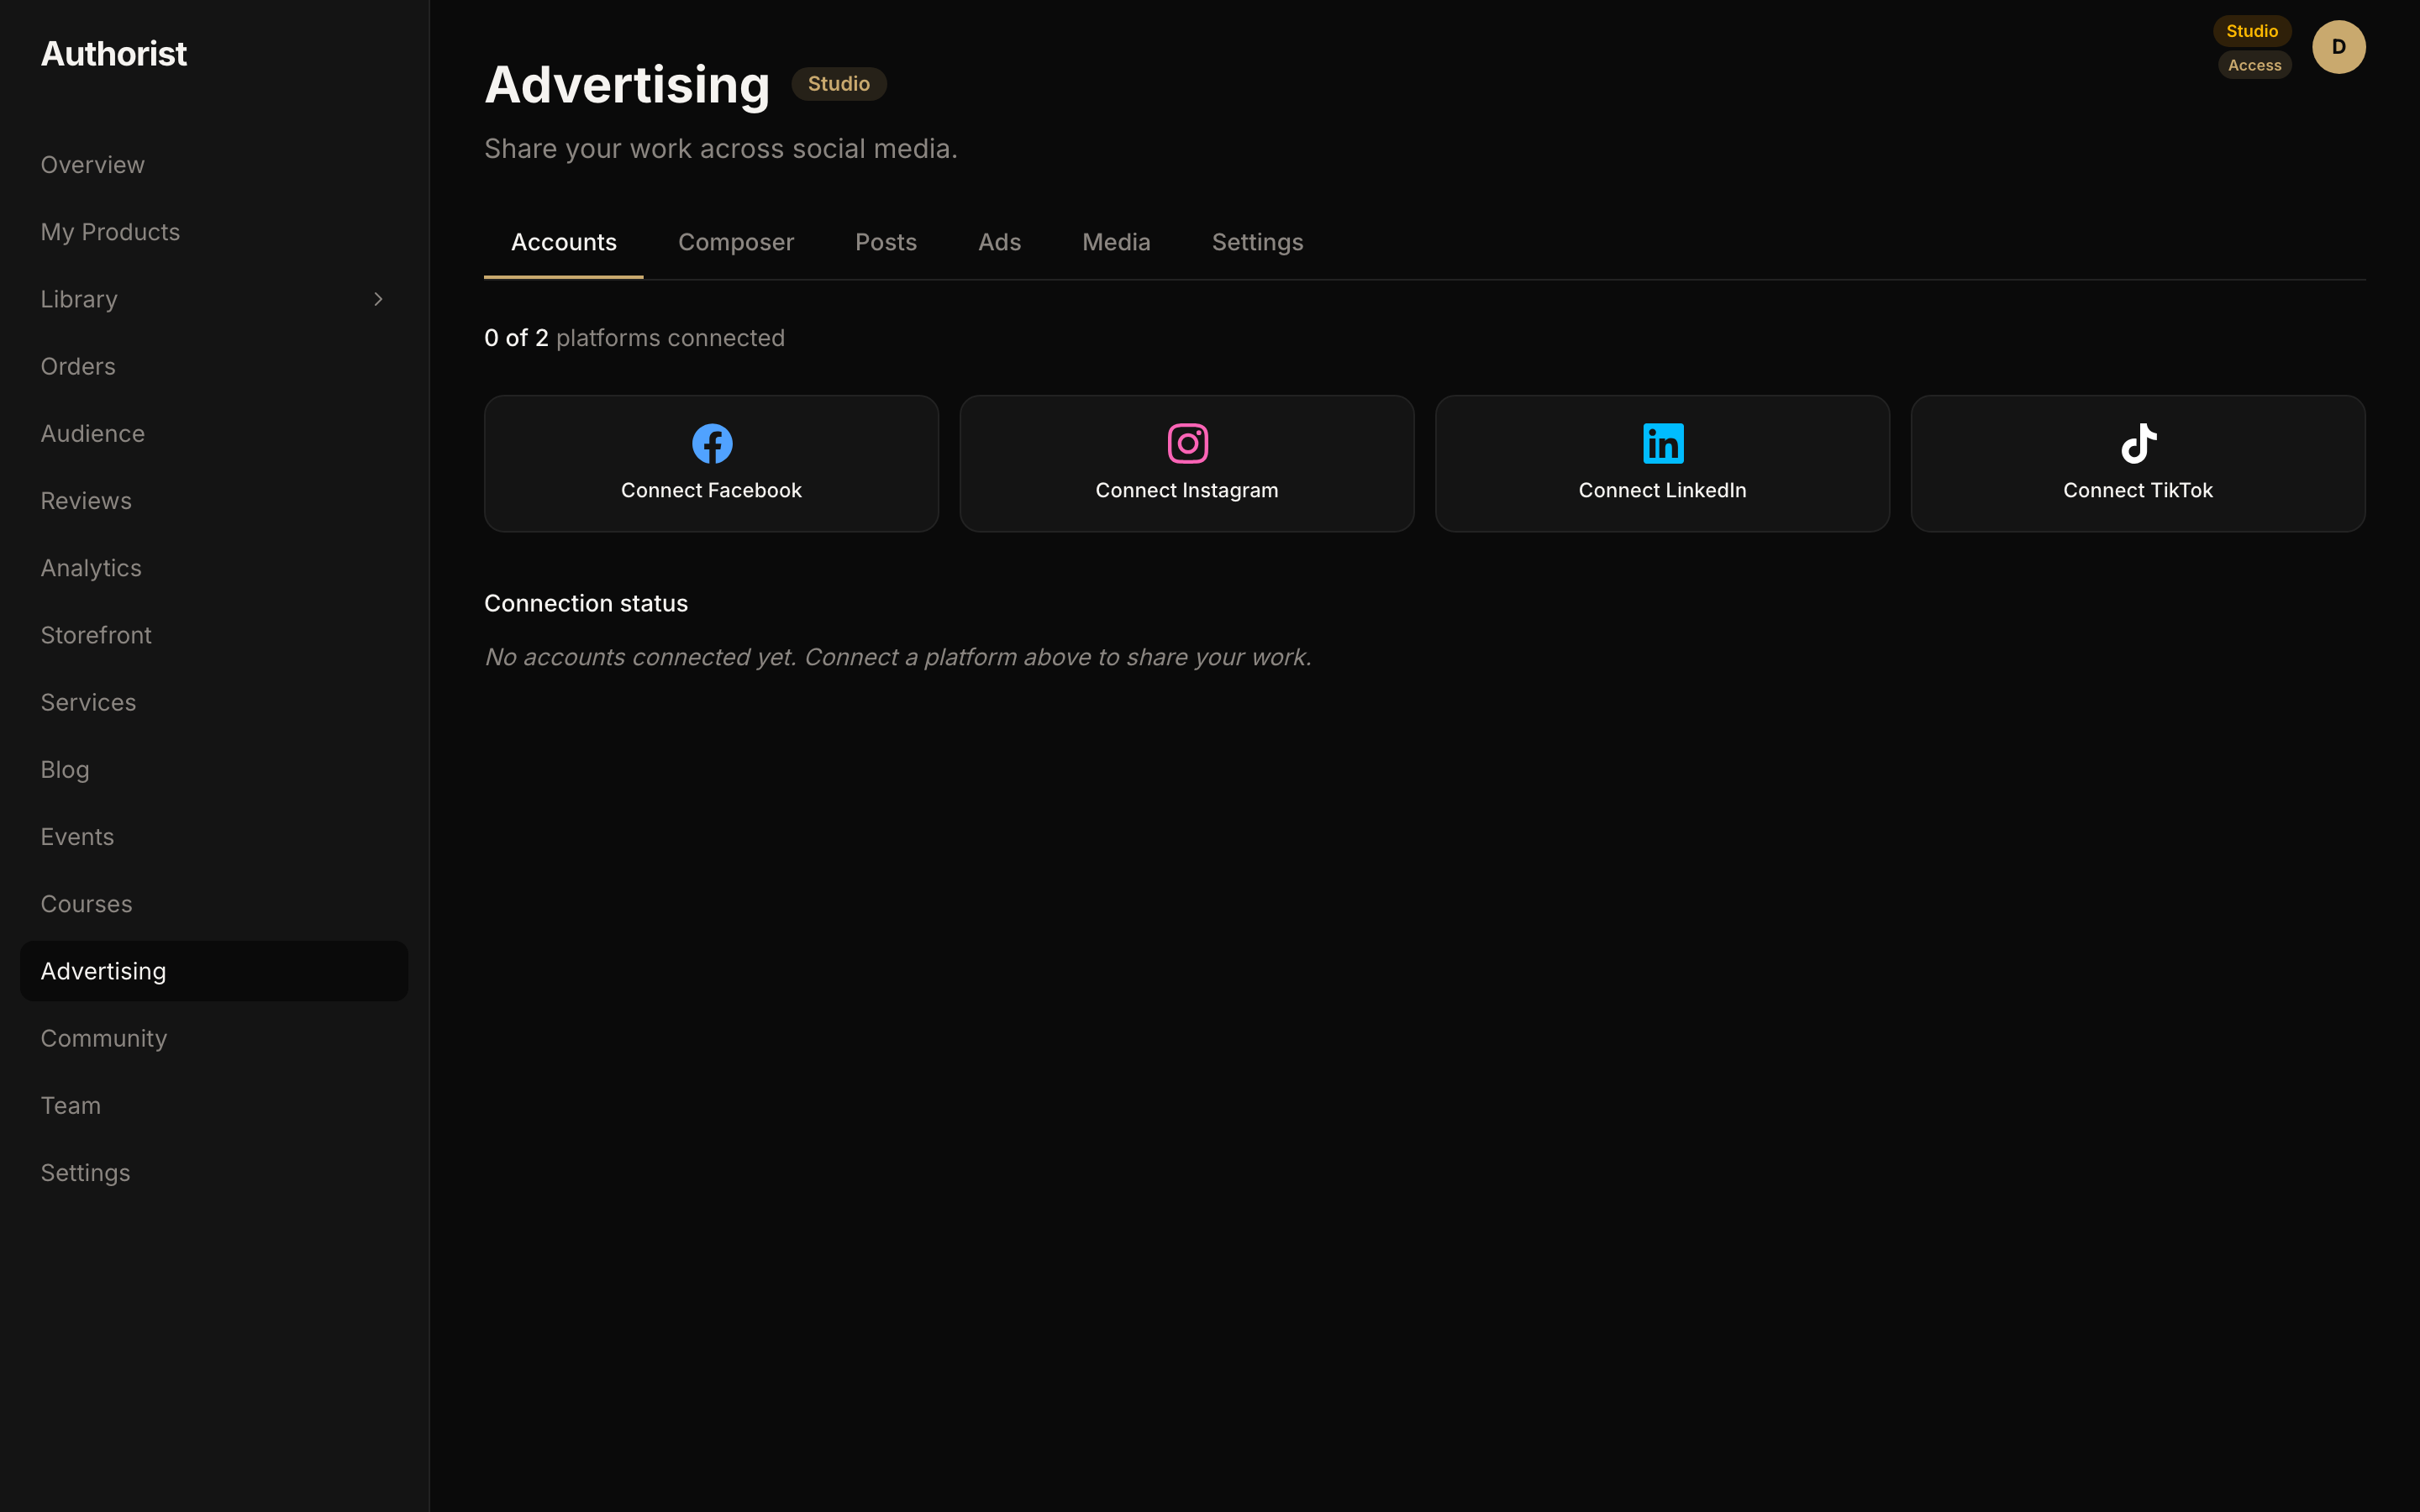
Dashboard → Advertising → Accounts. - 2
Connect Facebook & Instagram
Click Connect Facebook (or Connect Instagram) and sign in to Meta in the window that opens. When asked, choose the Facebook Page for your author brand; Authorist links your Instagram automatically if it's connected to that Page.
Heads up
You can connect up to 2 accounts. The Accounts tab shows your count (for example, 2 of 2) — if you're at the limit, disconnect one before adding another.
Step 2 — Connect your ad account and Pixel
Your Pixel is how Authorist tells Meta when one of your books sells, so Meta can find more readers like your buyers. The good news: Authorist tracks page views on your author page and reports your sales to Meta automatically — you never paste code into a website.
- 1
Open Advertising → Settings and connect your ad account
After connecting Facebook (Step 1), open the Settings tab and click Connect Facebook Ads. There's no second login — it reuses the Facebook connection you just made.
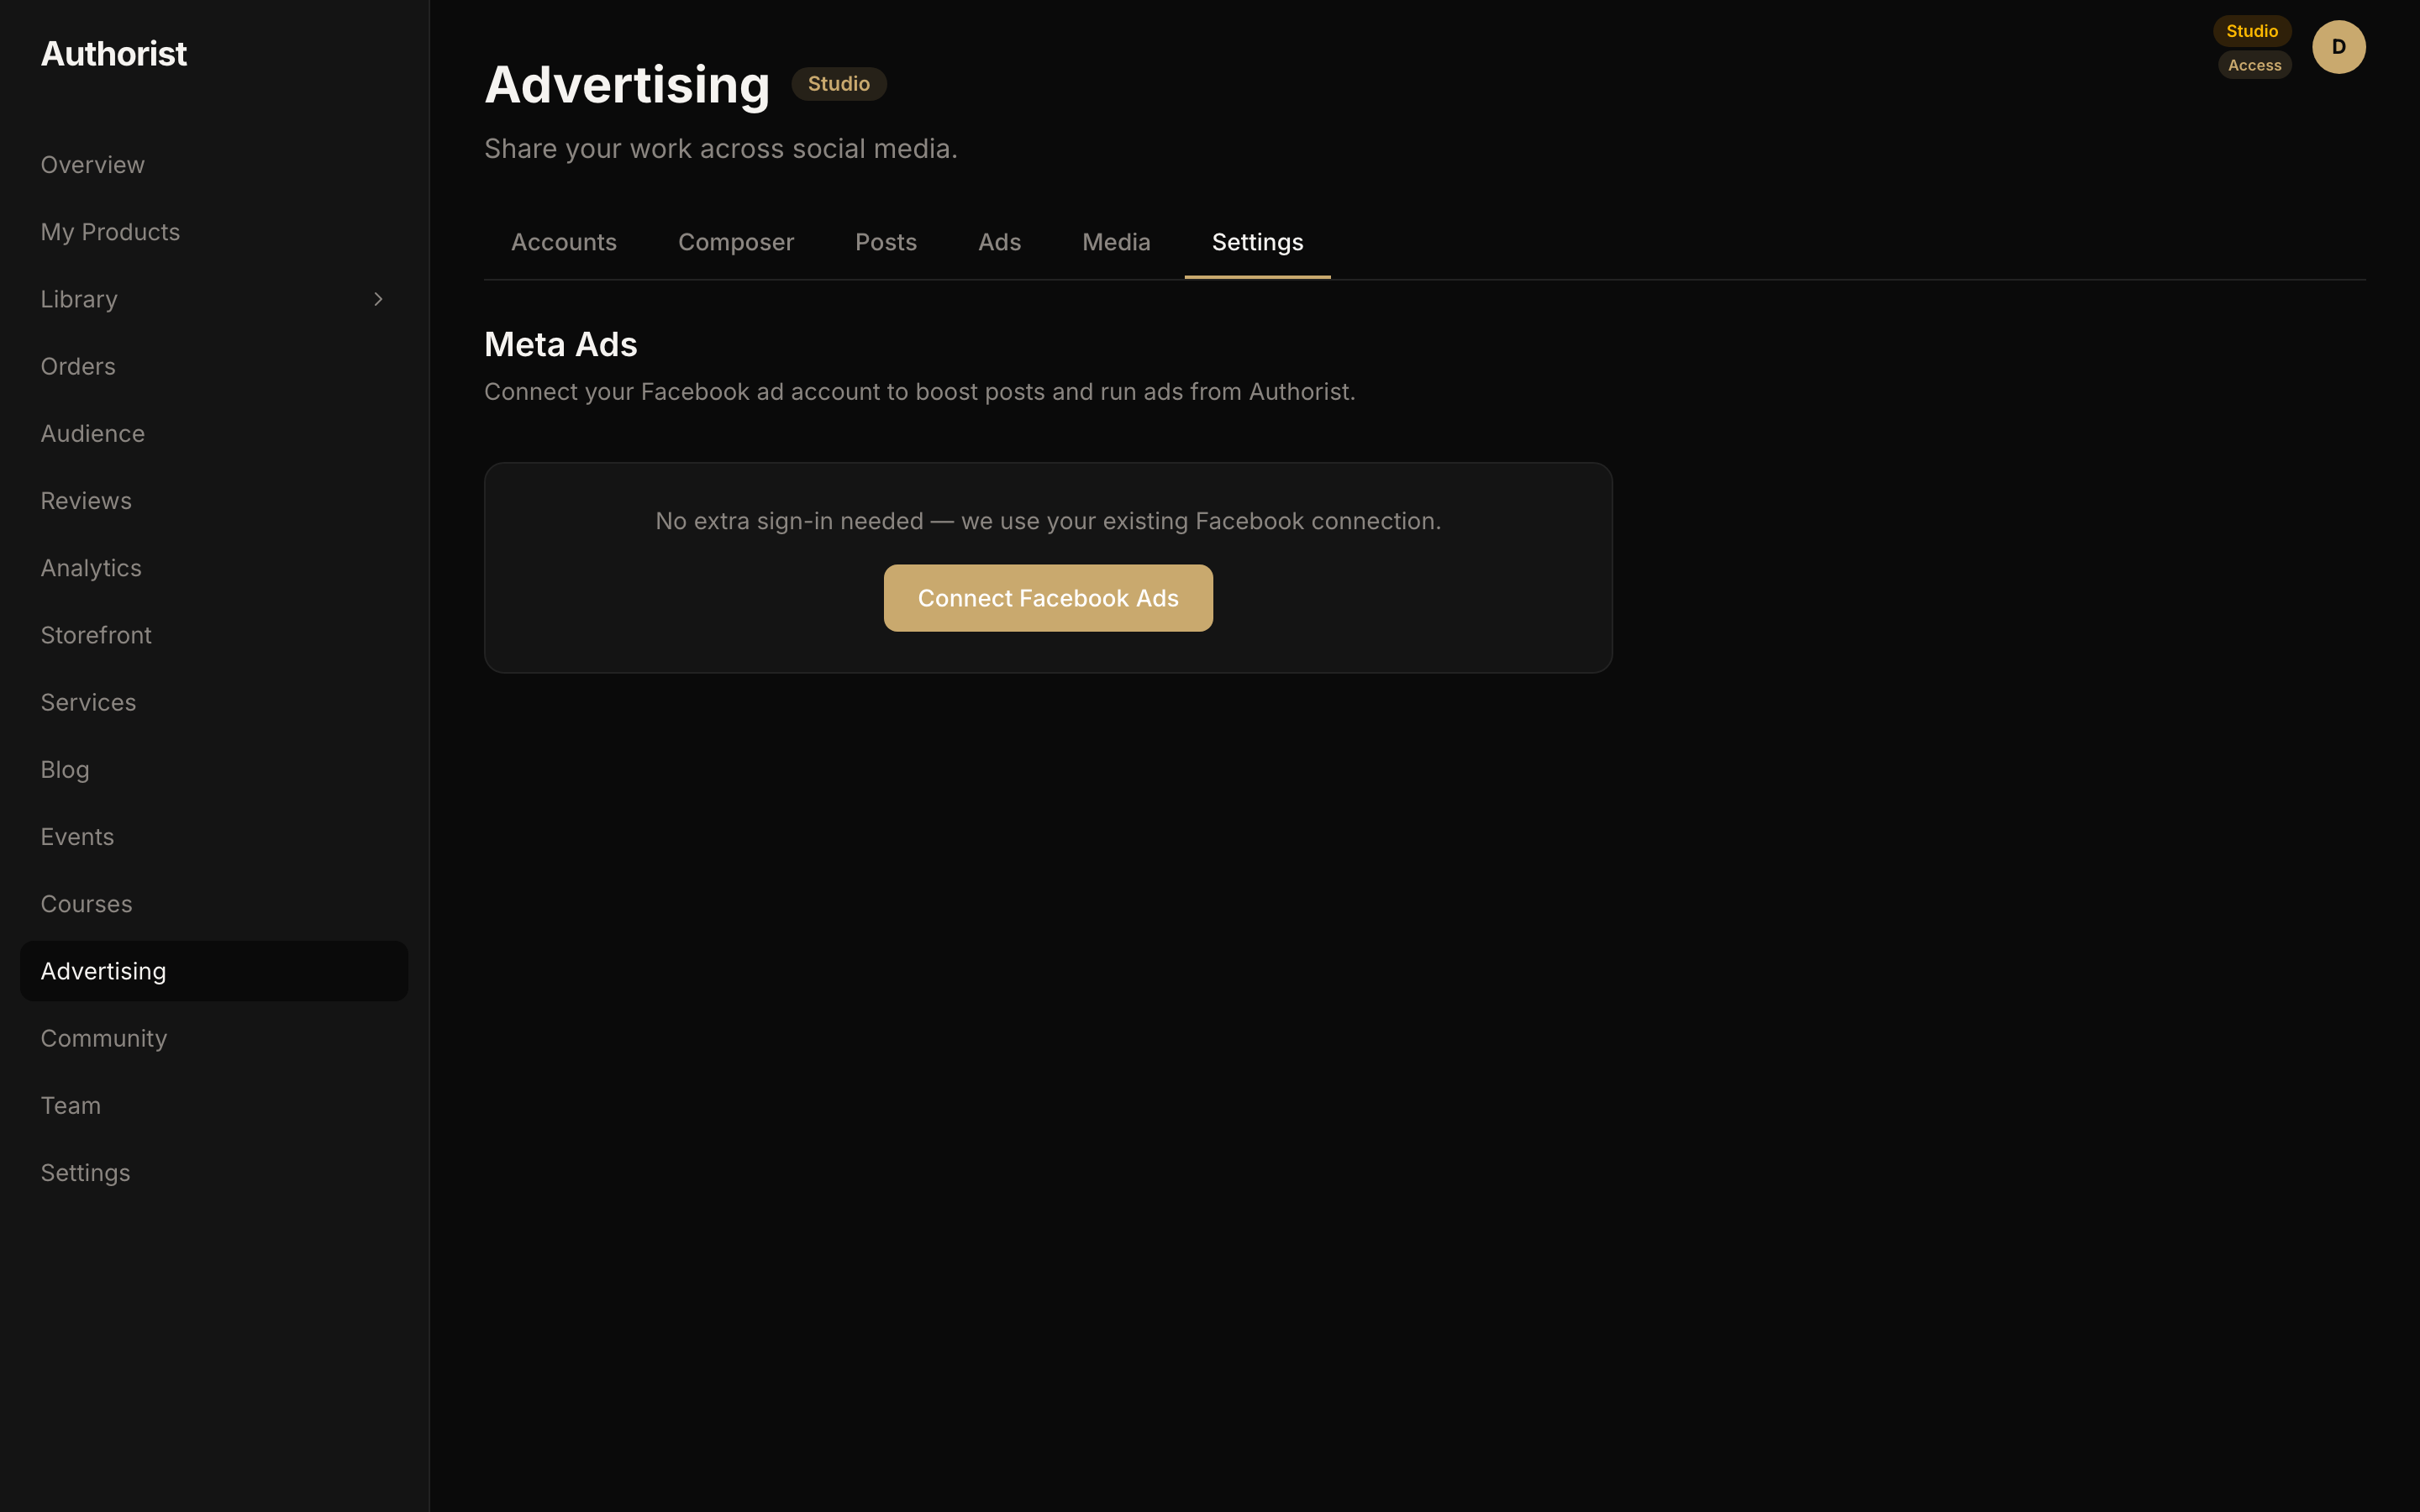
Advertising → Settings → Connect Facebook Ads. - 2
Pick your Pixel
Once connected, Authorist looks for your Meta Pixel automatically. If it finds one, select it and you're done. If you don't have a Pixel yet, create one in Meta first (below), then come back and paste its ID.
Don't have a Pixel yet? Create one in Meta
This part happens on Meta's own site, and Meta changes its layout often — here's the current path. You only need to create the Pixel and copy its ID; you do not need to install any code anywhere — Authorist handles that.
- 1
Open Meta Events Manager
Go to business.facebook.com and open Events Manager from the left menu. Use the same Facebook account and Page you connected in Step 1.
- 2
Start a new data source
Click Connect data (top-left), choose Web, then continue.
- 3
Create the Pixel (Meta calls it a 'Dataset')
Choose Create new dataset, give it a name (your author name works well), and click Create.
Tip
Meta renamed "Pixel" to "Dataset." It's the same thing — you're still creating a Pixel; Meta just stores it inside a dataset now. Your Dataset ID is your Pixel ID. - 4
Skip the website install
Meta will offer ways to "install" the Pixel on a website. Skip or close that step — Authorist installs and fires the Pixel on your storefront for you.
- 5
Copy your Pixel ID
Go to Events Manager → Data Sources and select your new Pixel/Dataset. The ID — a 15–16 digit number — appears next to its name. Copy it.
- 6
Paste it into Authorist
Back in Authorist (Advertising → Settings), paste the ID into the Pixel field. Your Pixel is now set; sale reporting turns on once your ad account is connected (Step 2).
Tip
Step 3 — Create your first ad
- 1
Go to Ads and create one
In Advertising → Ads, create a new ad (or boost an existing post). Choose what you're promoting, your audience, and your budget, then publish. Authorist builds and launches the ad, but it runs on your own Meta ad account and Meta charges your payment method directly for the budget you set — Authorist never takes payment for ad spend.
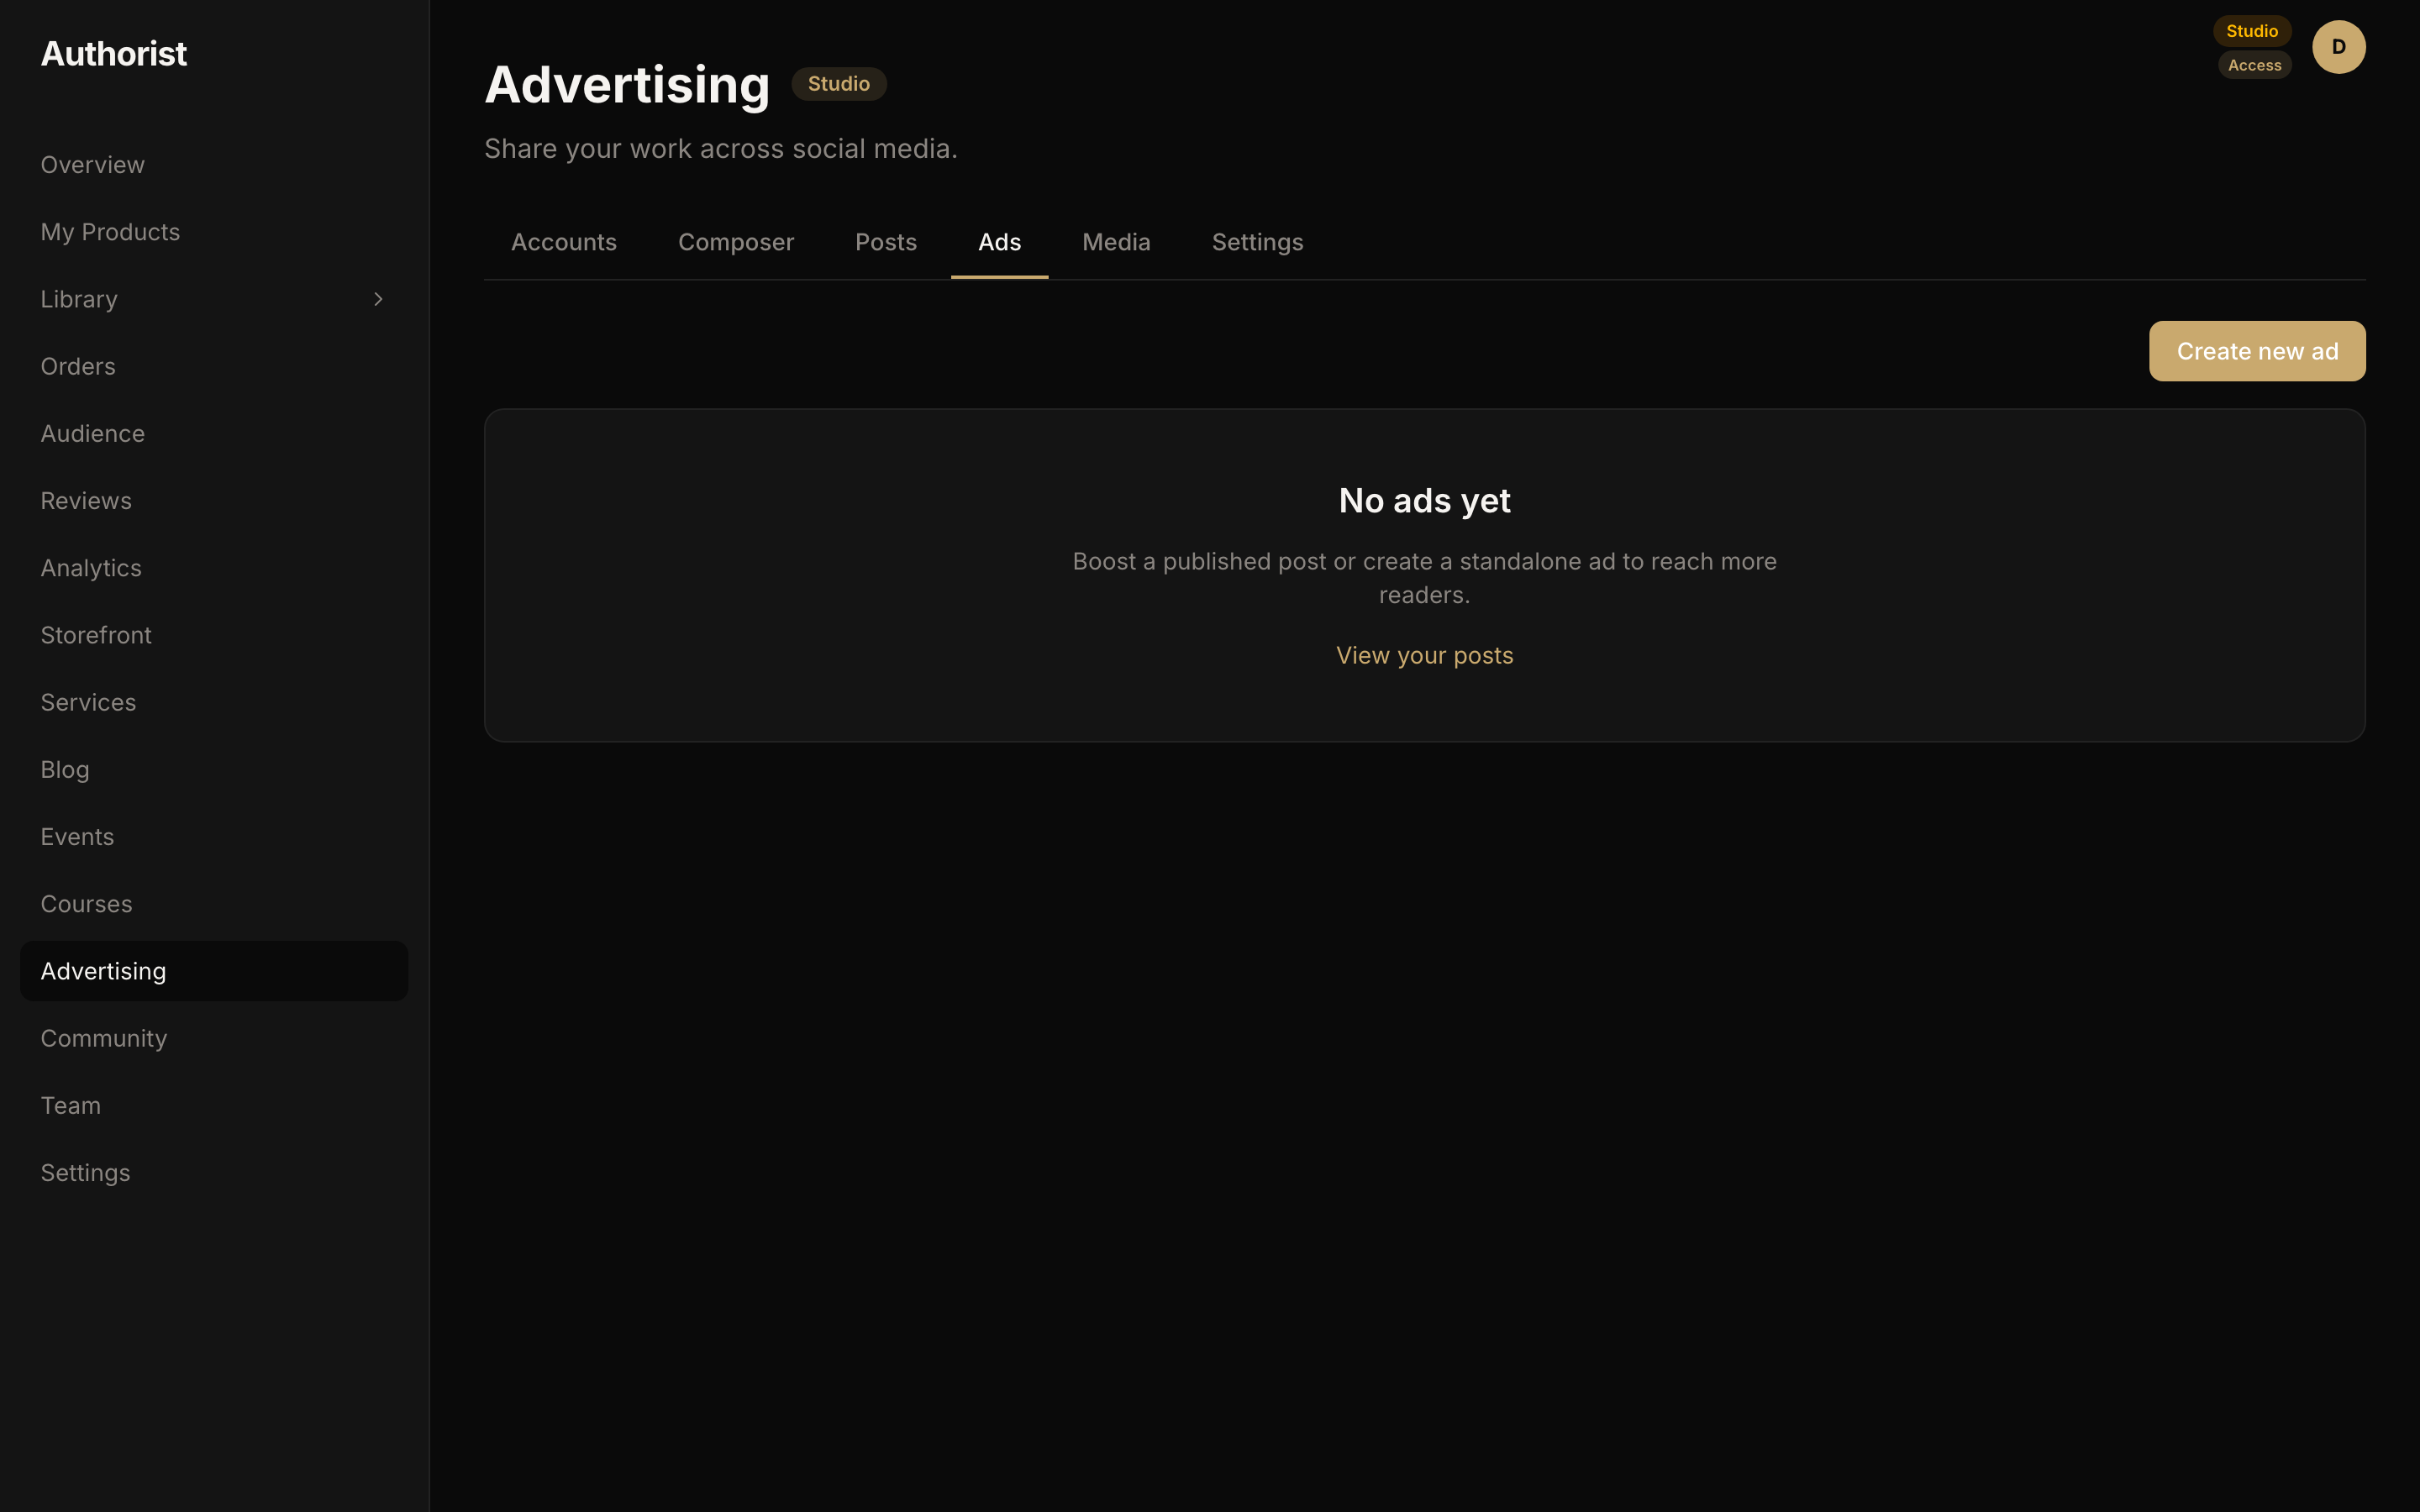
Advertising → Ads → create or boost. - 2
Watch your results
As your ad runs, Authorist shows your ad's performance. For detailed ad-to-sale attribution, review your results in Meta Ads Manager.
Common problems
Heads up
- "Set up a Pixel first" when adding conversions — connect or paste your Pixel in the Settings tab (Step 2), then try again.
- Can't connect another account — there's a 2-account limit; disconnect one in Advertising → Accounts to free a slot.
- Can't find your "Pixel" in Meta — Meta renamed Pixels to Datasets; look under Events Manager → Data Sources. The Dataset ID is your Pixel ID.
- No Pixel activity yet — normal right after setup; events appear once people visit your storefront and buy.
- Ad won't publish or shows a "payment" error — your Meta ad account needs a valid payment method (Meta charges you directly for ad spend). Add or update it in your Meta account, then try publishing again.
- Your ad was rejected — Meta reviews every ad against its advertising policies. Open Meta Ads Manager, read the policy notice on the rejected ad, then edit and resubmit.
- The Page picker is empty when connecting — you need a Facebook Page (not just a profile). Create one in Meta first, then connect again.
What's next
- Browse more guides — more marketing how-tos coming soon.